After entering the "Users" tab, we get the following view:
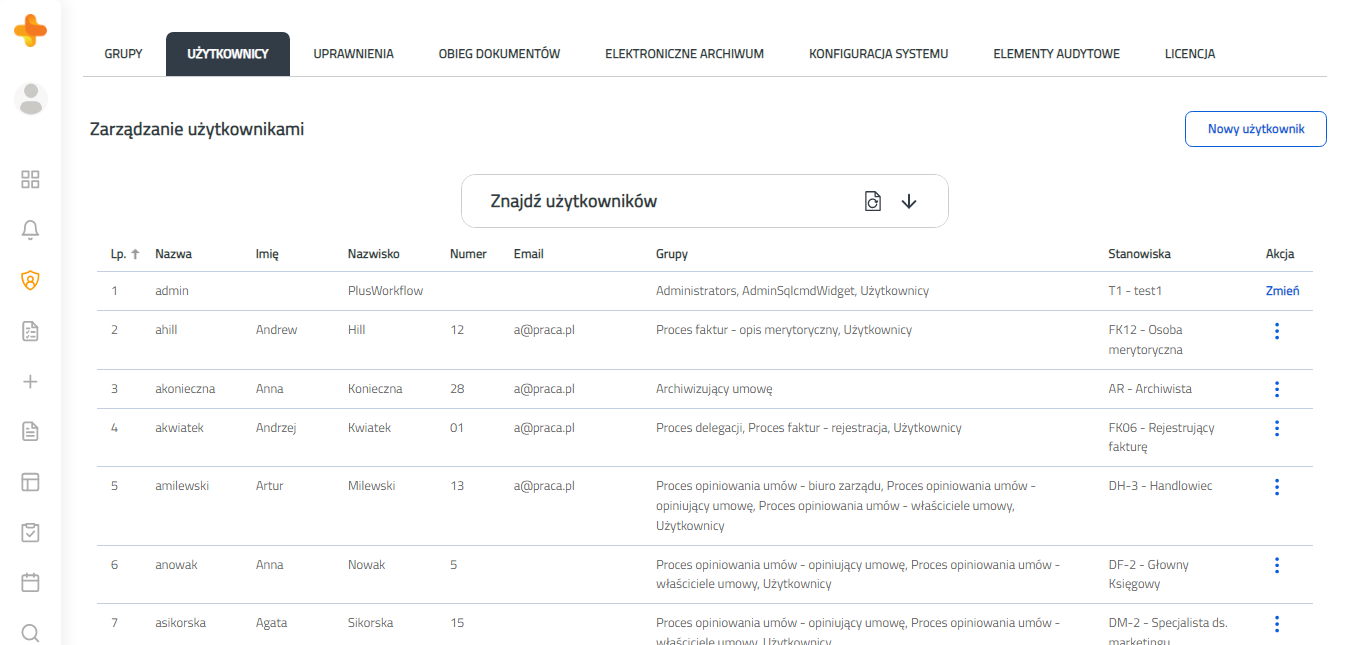
Figure 3.1. View of user management. It contains a form with which we can search for specific users and a table containing all information about users added in the system.
3.1. Adding a new user
The form for adding a user consists of the following fields
- Domain - this is the domain to which the user belongs (the domain should be added earlier - adding the domain).
- Name - this is the login of the user. The login must be unique within the entire system. The system will not allow you to add a user with a login that already exists in the system or that contains inappropriate characters. Permitted characters are letters, numbers and ["-", "_", "/", "."].
- First name - first name of the user being added.
- Last name - last name of the user being added.
- Number - an additional number (with the possibility of entering not only digits) that we can give to the user.
- New password - a password mandatory when logging in by the user.
- Confirm password - confirm password. It must be the same as in the "New password" field.
- Email - the email of the user being added.
- Group - group to which you want to assign the user. The group must be created in advance.
- Positions - positions that we want to assign to the user. The position must be created in advance.
To complete the "Group" field, click on the icon of the window ( ). The following window will appear:
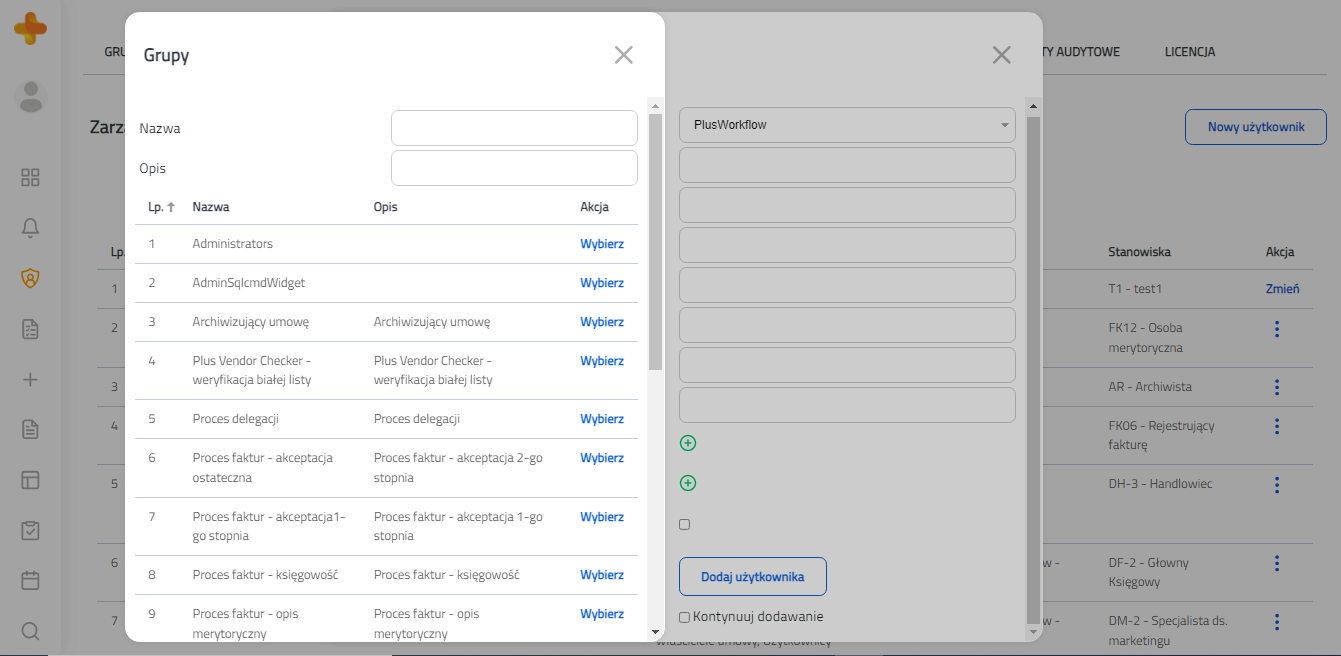
Figure 3.2Window with groups.
In order to select a group, press the "Select" button next to the group. After completing the group selection, close the window with the help of a cross in the top right corner or left-click the mouse outside the window area.
Exactly the same situation occurs for the "Position" field. After pressing the window icon () the following will appear:
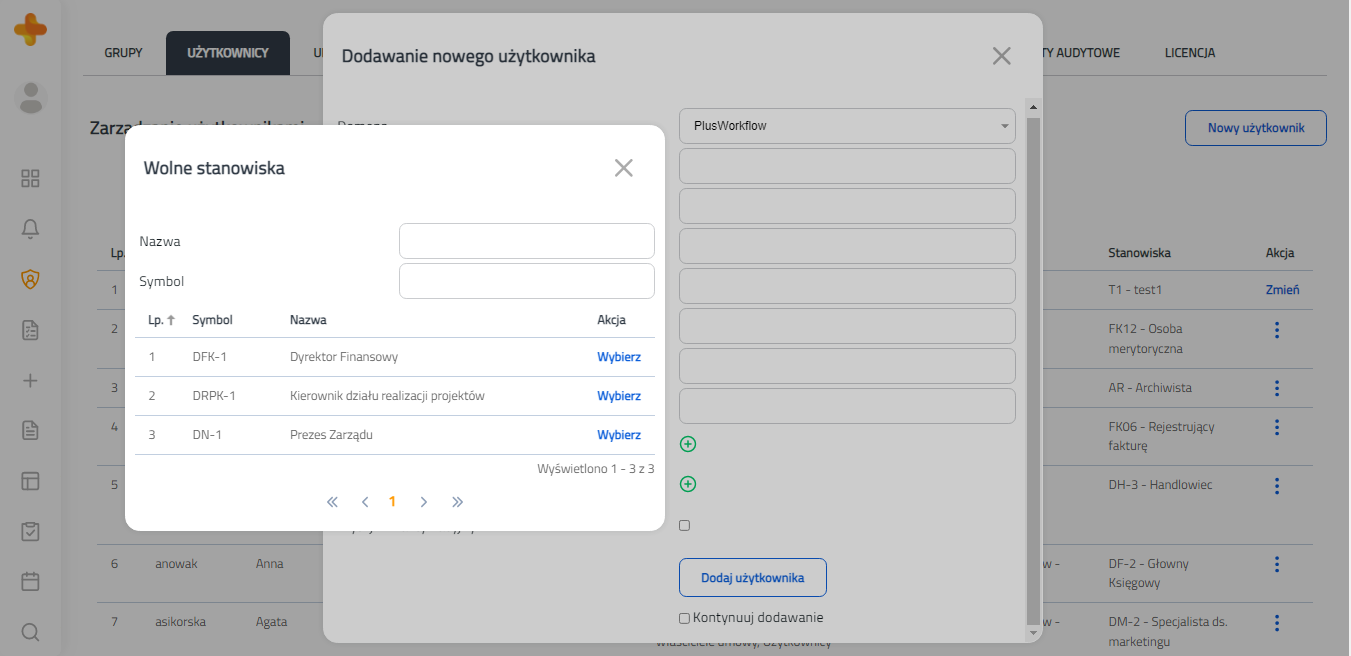
Figure 3.3. Window with positions in the system.
To add a position to the user, press the "Select" button at the given position. Additionally, we can filter users using text fields. Filtering may take place after the name or the position symbol. After finishing adding positions, close the window with the help of a cross in the upper right corner or left-click the mouse outside the window area.
After completing the new user form, you must confirm it with the "Add user" button. After successful addition of the user, we will be informed about this with the appropriate message.
3.2. Editing a user
The user that have been added can be edited. To do this, press the "Change" button in the table with the users in the "Action" column (see Figure 3.1). Each button refers to the row in which it is located. After calling the action, the following view will be displayed:
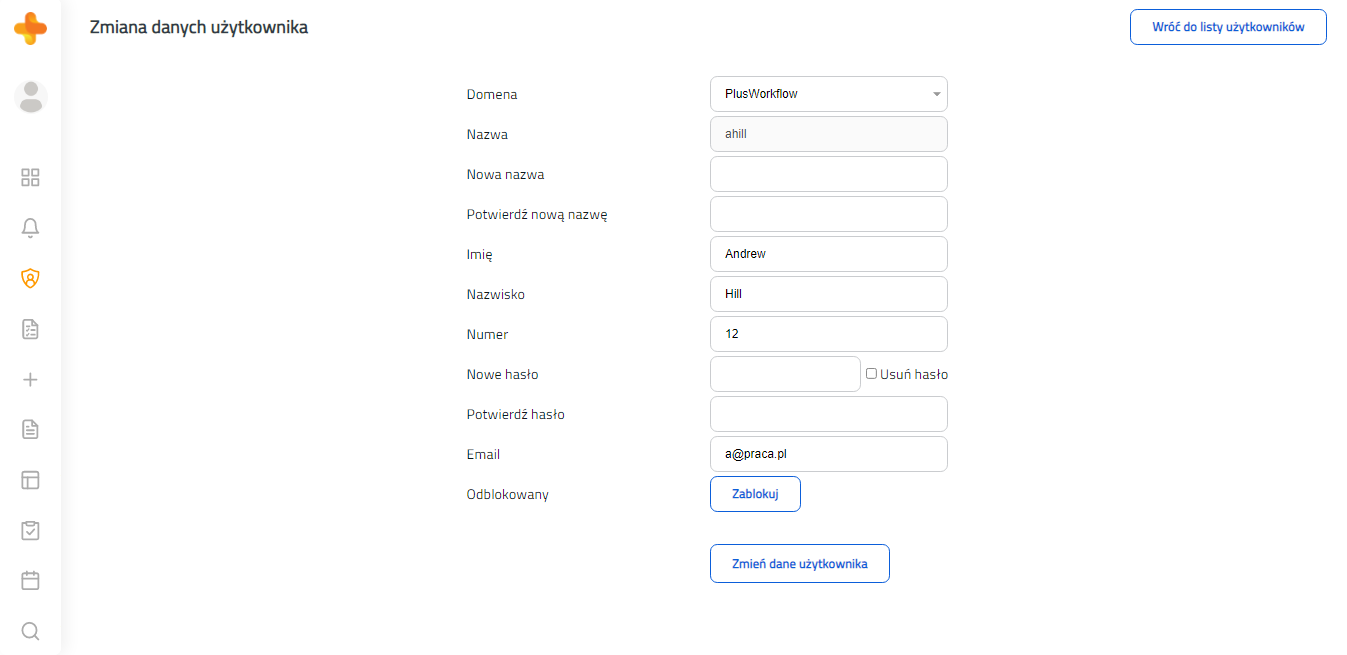
Figure 3.4 User edit view
At the top we have a form in which the fields are subject to edit: Name, First Name, Last Name, Number, Password (we can delete them by checking the "Delete" checkbox) and Email. The table below shows the groups to which the user belongs. By using the "Delete group" button in the table with the groups in the "Action" column (see Figure 3.4) we can disconnect the given group from the edited user. Above the table is the "Add group" button with which we can add a new group to the user. After pressing the button, a window with available groups will appear (see Figure 3.2). At the bottom there is a table with attached positions to the user. The position can be removed using the "Delete" button in the table. Above the table is the "Add position" button with which we can add a new position to the user. After pressing the button, a window with available positions will appear (see Figure 3.3).
3.3. Searching for a user
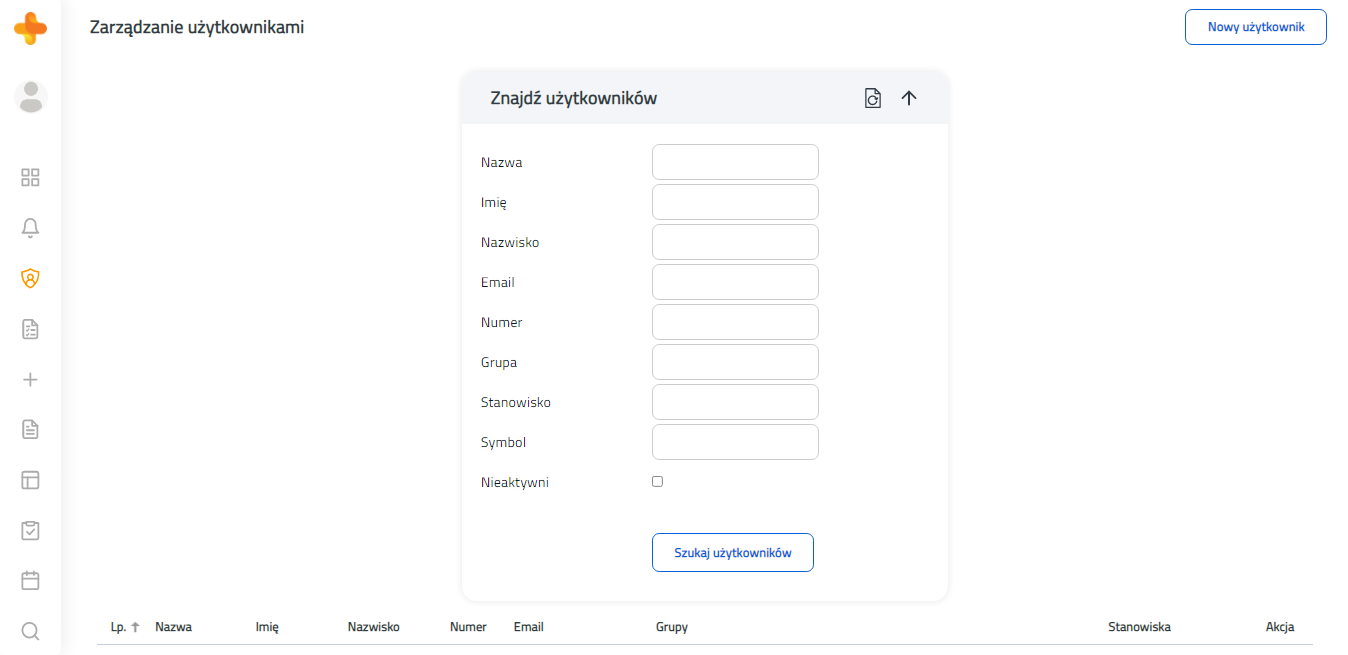
Figure 3.5 User search form
A form called "Find users" is used to search for users (see Figure 3.5). We can search using the following fields: Name, First Name, Last Name, Email, Number, Group, Position, Position Symbol. Checkbox "Inactive" at the bottom defines whether to search for active (unchecked) or inactive (selected) users. After completing the form, press the "Search for users" button. The results will be presented in the table with the users located under the form.
3.4. Deactivate a user
Deactivation allows first of all to rewrite all current and possible future user tasks to other selected user in the system. Additionally, substitutions, views, reports and notifications of the user are reassigned.
To start deactivation, press the "Deactivate" button for a given user in the table with all users (see Figure 3.1). The following window will appear in the browser:
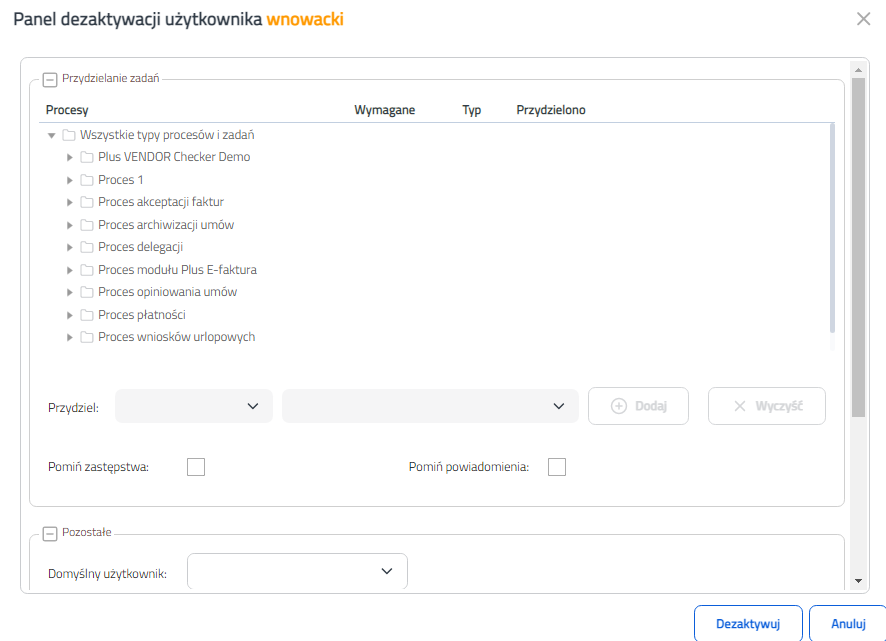
Figure 3.6 User deactivation panel.
The top bar of the window contains information about the user you want to deactivate. Inside the window in the foreground there is a table. The first column contains all the processes in the system. They are displayed in the form of a tree. The first level includes definitions of processes, the next level includes roles defined in the process, and finally the definitions of tasks. The second column named "Required" determines whether a given task must be assigned by the user. The task is required for allocation if the deactivated user has his instance in the taskbox. Remember that tasks that are not required also have to be assigned, however, if we do not do it ourselves, then during deactivation they will be automatically assigned to the user defined in the configuration file as EmptyTaskUserName. The next column named "Type" determines by means of the icon whether we have assigned the task to the group or the user. Allocations are presented in the last column.
Assigning tasks is very intuitive. Select the tree level or several at the same time using the Ctrl or Shift key and the left mouse button. If we mark the process or role level then all tasks belonging to this process/role will be assigned. Then select from the first list under the table whether you want to assign tasks to the group or the user. In the next list choose a specific user or group. Now press the button with the "+" sign. The selected user/group will be assigned to all selected tasks, and we will be additionally informed about it by a message. If you want to delete the allocation from selected tasks, just press the "Clear" button.
In addition to reassigning tasks it is necessary to reassign all substitutions, reports, views and notifications that a deactivated user has. For this purpose, we can select a given user from the "Default user" list, which will automatically fill all other lists, or you can select users individually from given lists.
The last step is pressing the "Deactivate" button. At this moment the deactivation process begins. Remember that the system will not allow the user to be deactivated if we do not assign all the required tasks and we do not set assignments for replacements, reports, views or notifications. At the end we will be informed if the deactivation was successful.
If you want to resign from deactivating the user, close the window with the "Cancel" button or use the cross in the upper right corner of the window.
Searching for deactivated users
To search for deactivated users, select the "Inactive" checkbox in the user search form (see Figure 3.1).
3.5. Editing the assignment of deactivated user's tasks
You can change the assignments of the deactivated user's tasks. To do this, we must first search for the deactivated user and then press the "Edit" button. We will show exactly the same window as in Figure 3.1, except that only the table with the tasks will be presented. All tasks will be filled with current assignments (this can be used as information about reassigned tasks). The assignment procedure is the same as during deactivation (see section 3.5). Press the "Edit" button to confirm changes or "Cancel" if you do not want to edit anything.
3.6. Activating a deactivated user
You can activate the deactivated user at any time. To do this, first search for the deactivated user and then press the "Activate" button with this user. An activated user has no information. It is as if it has just been added to the system.
3.7. Removing a user
In the PlusWorkflow system, we can only remove deactivated users. First of all we have to search for them. To do this, check the "Inactive" checkbox in the user search form (see Figure 3.1). When the deactivated users are displayed, the "Delete" button will appear next to them. After pressing it, we will be asked if we really want to delete this user. After confirmation, the user will be completely removed from the system. This action is irreversible. We will no longer have any information about this user in the system.