1.1. Catalogs
The catalog is part of the device and most often defines the category of files that are in it, e.g. invoice files, order specifications.
Managing archive catalogs, located in Administration -> Electronic archive -> Catalogs. After entering the "Catalogs" tab, the following view appears:
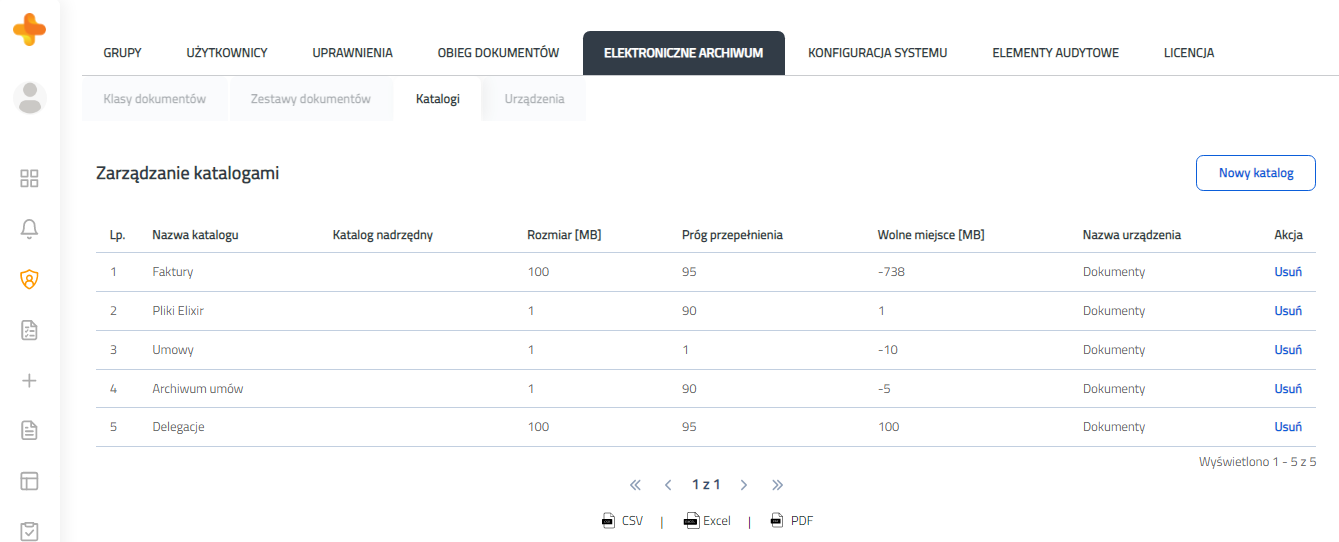
Figure 6.2.1 shows the view after entering catalog management.
In the above example, a list of added directories in the archive is available. Each directory can be deleted. The catalog can not be edited. Each catalog has the following properties:
- Catalog name - specifies the name of the catalog on the device
- Parent catalog - we can specify a parent catalog, eg the "Invoice" catalog may be in the "EOD invoice" catalog
- Size - defines the maximum size of the directory
- Overflow threshold -?
- Free space - a column with information about an available space in the catalog
- Device name - is the name of the device in which the catalog is located (it is a list of devices that are added to the system).
1.2. Adding a catalog
To add a catalog, click on the "New catalog" button (see Figure 6.2.1). After clicking, the form for adding the catalog will appear, as below:
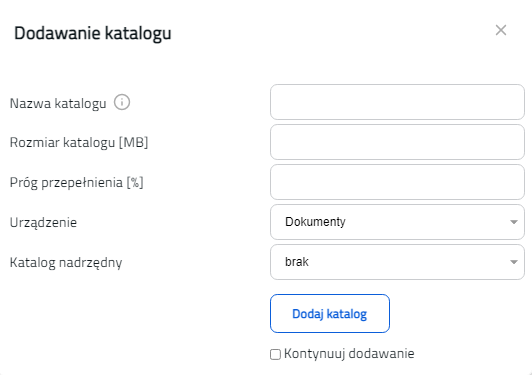
Figure 6.2.2 shows the form for adding a catalog.
The catalog is added by filling in the form (see Figure 6.2.2). Complete the fields "Directory name", "Directory size", "Overflow threshold" and "Device". The "Device" field is a list of created devices. If the list is empty, you must first add the device .
Dynamic catalog names
Catalog can have a dynamically set name based on the current date. To create such catalog, the appropriate parameter should be added to its name:
<RRRR> - Current year (np. 2019)
<RR> - Current year (np. 19)
<MM> - Current month
<DD> - Current day
Example:. Invoices-<RRRR>-<MM> creates a catalog called Invoices-2019-06
Note: The catalog name cannot contain illegal characters. For Windows, these are characters / \: *? "< > |.
1.3. Removing a catalog
Each catalog can be removed from the system. To do this, click on the "Delete" button next to the selected catalog (see Figure 6.2.1). After clicking the button, a dialog will appear asking you to confirm the deletion of the catalog. Click on the "Ok" button.