3.1. Process management
All available processes in the system are managed in the Processes tab in Administration -> Document workflow. The main view is a table with all process definitions in the system.
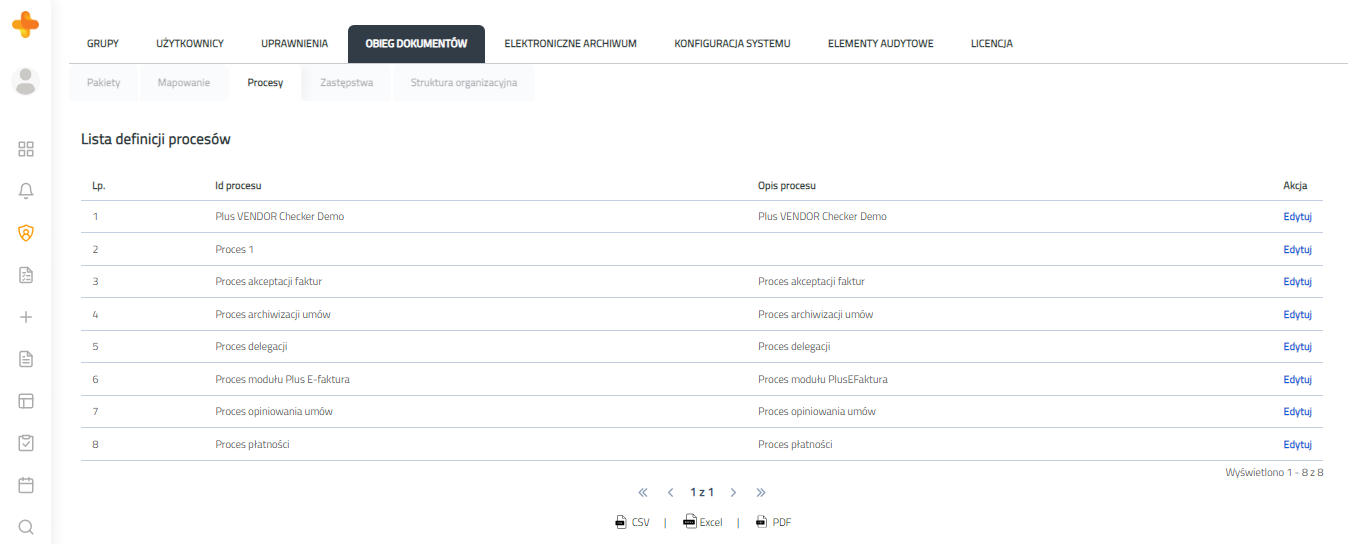 Figure 5.3.1 Processes tab view
The table contains the name and description of the process. Use the "Edit" button to enter the edition of the selected process.
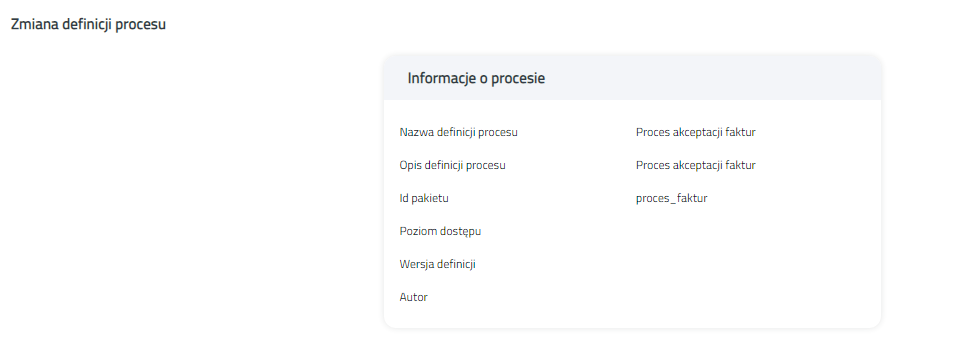
Figure 5.3.2 Process editing
The upper table contains information about the edited process. The following tabs are available below: "Tasks", "Notifications", "Document Templates", "Protection", "Settings", Document Views "," Process Map "and" Process Variables ".
3.1.1. Tasks
"Tasks" tab contains a table with all defined tasks in the process. In the table we have information about the name and description of the task.
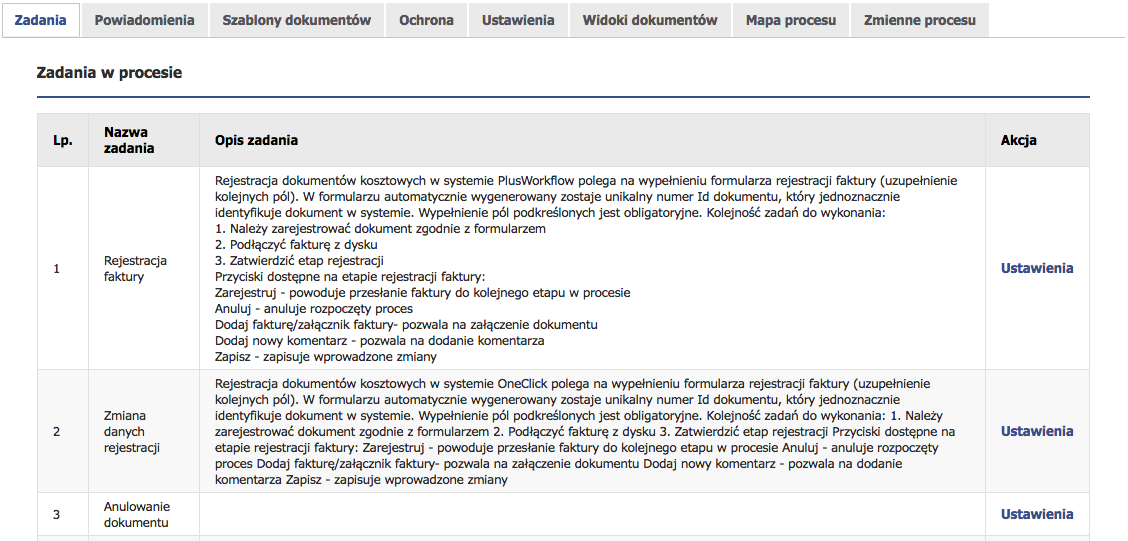
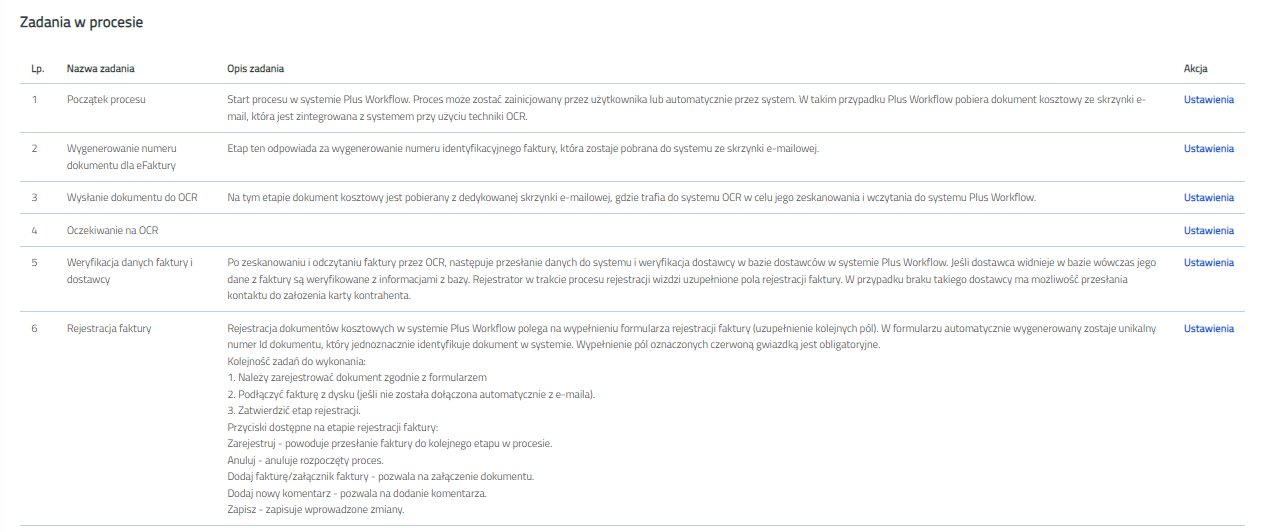
Figure 5.3.3 Process edition - Tasks tab
In the Action column we have the ability to edit settings regarding the visibility of tabs.

Figure 5.3.4 The window for changing task settings
3.1.2. Notifications
In the notification tab you can define the e-mail notifications for the process.
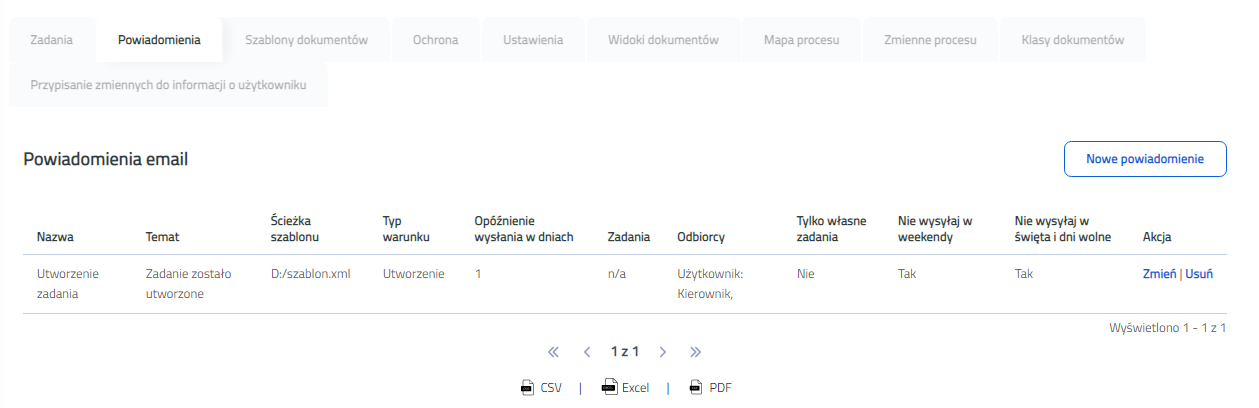
Figure 5.3.5 Process edition - Notifications tab
The table shows already defined notifications. The definition of an existing notification from the table in the figure specifies that the user with the position "Manager" will receive an email one day after creating the task "Holiday application submission". The subject of the e-mail will be "The task has been created" and its content has been defined in the "template.xml" file.
After pressing the "New notification" button, the form of adding email notification will open.
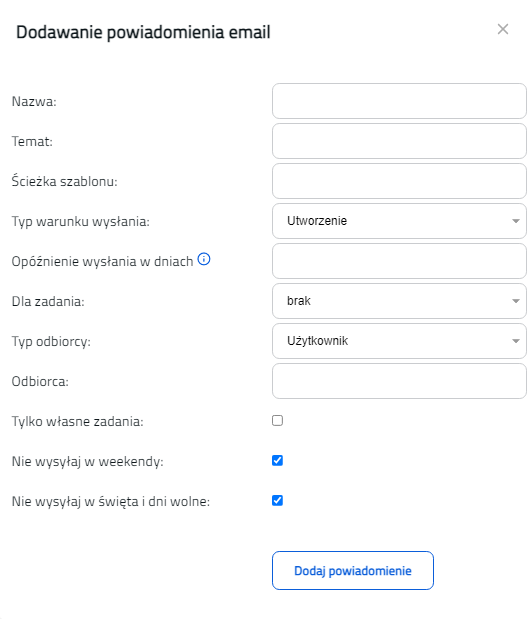
Figure 5.3.6 Add notification window
It consists of the following fields:
- Name - the name of the notification being defined.
- Subject - the subject of the email you send.
- Template path - the full path to the file with the email template. Creating a template is described in Notification configuration..
- Type of sending condition - a drop-down list from which we can choose when the notification should be sent. We can choose between "Creation", "End" and "Exceeding the deadline".
- Delay of sending in days - enter here the number of days after which the e-mail should be sent from the time the defined action was performed. Holidays are not included.
- For a task - we define what task the sending condition type should apply to.
- Recipient type - to whom the e-mail should be sent. Choose from: "User", "User (Variable)", "Group", "Position", "Executor", "Executor's Supervisor Position".
- Receiver:
- User, Group, Job title, Executor - specific value (e.g. user login or group name)
- User (Variable) - identifier of the process variable that contains the user's login (or logins separated by a semicolon).
- Executor, executor's supervisor position - none (depends on the task defined in the "For a task" field)
- Only own tasks - defines whether defined recipients are to be notified about the task only if they are its executors.
The completed form is confirmed with the "Add notification" button.
Defined notifications can be removed using the "Delete" button in the table next to the notification and can be edited using the "Change" button. In the notification edition, we can make changes to all the fields in the notification form.
3.1.2.1. Translation of email notifications
You can also translate email notifications. The system can send an email notification to each recipient in the user's language (configured individually in the account configuration). To do this, you do not need to change the notification configuration above. The notification template should be translated into the user's language, add the language abbreviation preceded by an underscore to the user's file name, and place in the same directory as the default notification template file.
E.g. for the "template.xml" notification template in English, Hungarian and Polish:
- create the "template_en.xml", "template_hu.xml" and "template_pl.xml" files accordingly
- include the content of the email in the appropriate language
- put all 3 translated files next to the file "template.xml"
To translate the subject of the email, add to the implementation file the entry, where the value is the translated subject of the email and the key is the subject of the email, as in the configuration (replace spaces with underscores).
E.g. for the subject of email "Subject of email notification" in English:
- find the implementation translation file "customMessages_en.i18n"
- add an entry to it
Temat_powiadomienia_email=Email notification subject
Each time you try to send a file, the system will look to see if there is a translation of the e-mail content and e-mail subject in the language the target user has set. If no translated content file exists, the system will send a message from the default template. If there is no translation of the subject of the email, the system will send a message with the subject as entered in the system configuration.
3.1.3. Document templates
In this tab we have the ability to define templates that can be used in the process to generate pdf files,
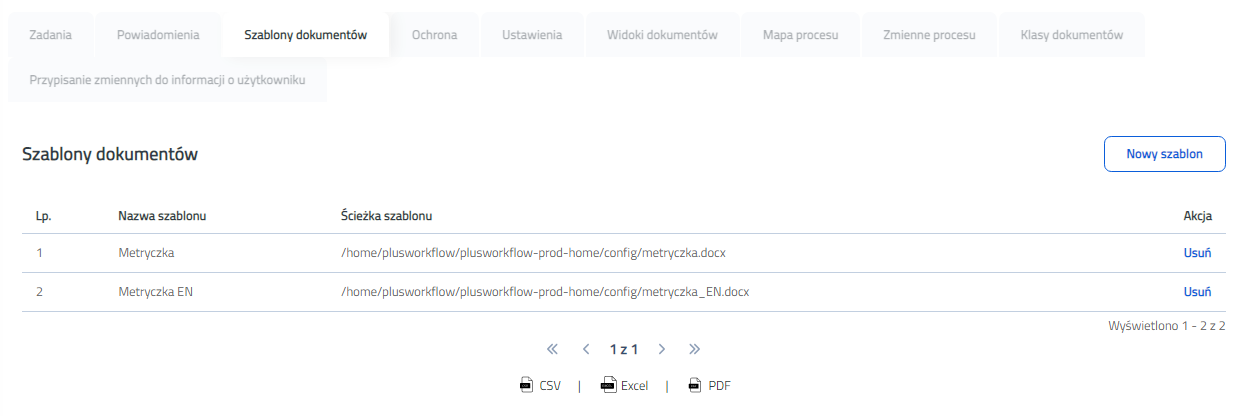
Figure 5.3.7 Process edition - Document templates tab
The table contains existing templates. Each template has its own name and path to the template file.
After pressing the "New template" button, the form for adding a new document template will open. Enter the template name and the full path to the template file. Finally, confirm with the "Add template" button. Templates are used when generating pdf files.
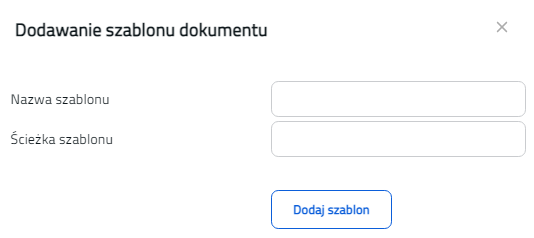
Figure 5.3.8 The window for adding a document template
Defined templates can be removed using the "Delete" button next to each template.
3.1.4. Protection
In this tab, we can define permissions for specific processes. The view is as follows:
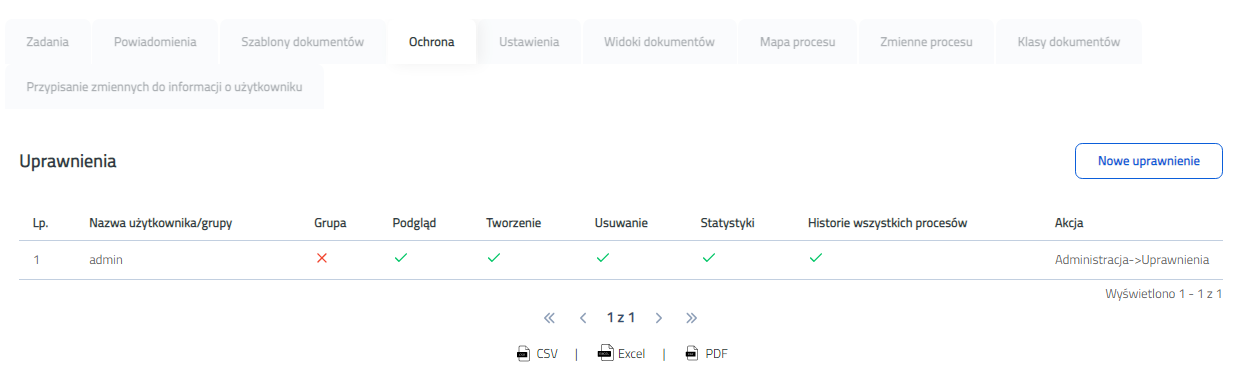
Figure 5.3.9 Process edition - Protection tab
Process permissions are divided into the following types:
- Process preview - allows you to search for a process.
- Process creation - allows you to create a process.
- Process Deletion - allows you to delete a process.
- Statistics - allows you to view process statistics.
The table in the figure shows the added rights for the edited process. The "Group" column indicates whether the permission applies to the group or the user. The "Action" column, on the other hand, allows you to delete rights added only from this level using the "Delete" button. For globally added permissions (see Permission Management ), we have information in the form "Administration -> Permissions". We cannot do anything with such permissions here, because they are only informative. The table shows that the user "anowak" has the right to view the process, assigned to him in global authority, and to create the process that has been assigned to him here. This permission can be removed. The last permission is full permission for the edited process for the "SharkGroup" group. They were granted in global permissions.
Below the table there is a form for adding permission to the edited process. In the first field, select a user or group. This selection is done using the "Users" or "Groups" buttons. After pressing the first button, a window will appear showing the selection of users (see Figure 2.3 and its description in Group management). After pressing the "Groups" button a window with group selection will open (see Figure 3.2 and its description in Users management ). Then we check the types of permissions we want to give to this process. Finally, we add the permission using the "Add Permission" button.
3.1.5. Settings
After entering the settings tab we will receive the following view:
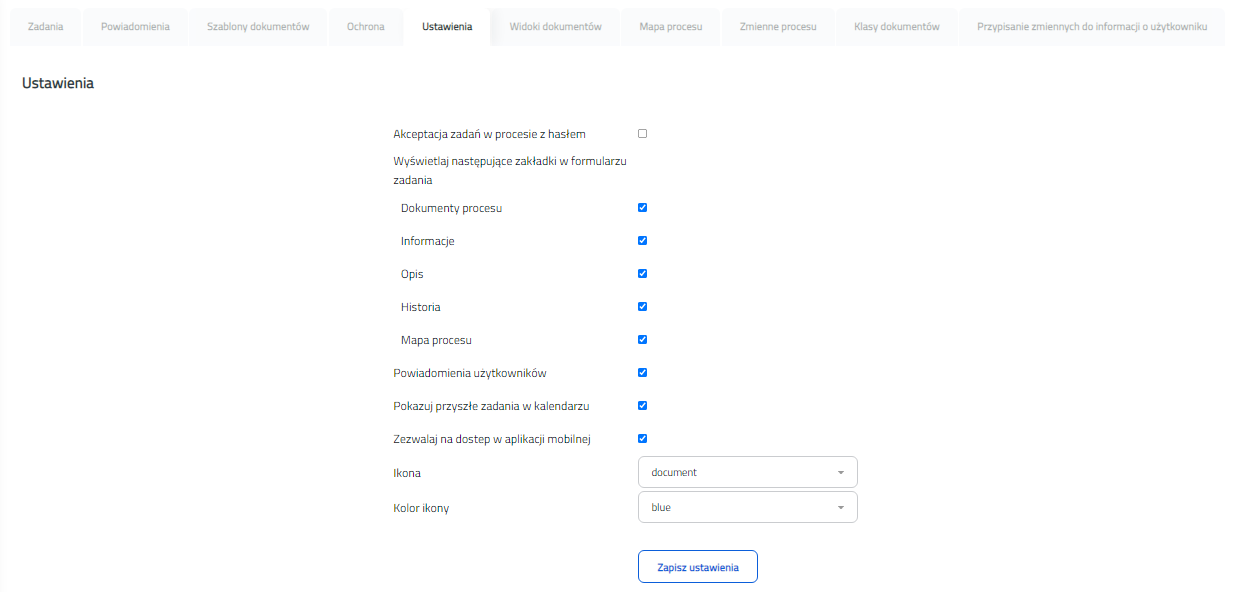
Figure 5.3.10 Process edition - Settings tab
We have the following options available here:
- Task acceptance in the process with a password - checking this option will cause that every user will have to reauthorize when accepting the task, i.e. they will have to enter their system login details. After successful authorization, the task will be accepted.
- Display the following tabs in the task form - the first 5 checkboxes allow you to define whether such tabs should be displayed on the task form of the edited process. Another chceckbox defines whether user notifications for tasks should be active. Using the last option, we determine whether tasks from this process are to be displayed in the calendar when searching for future tasks.
3.1.6. Document views
Document view is a view on the task form that displays the defined documents.
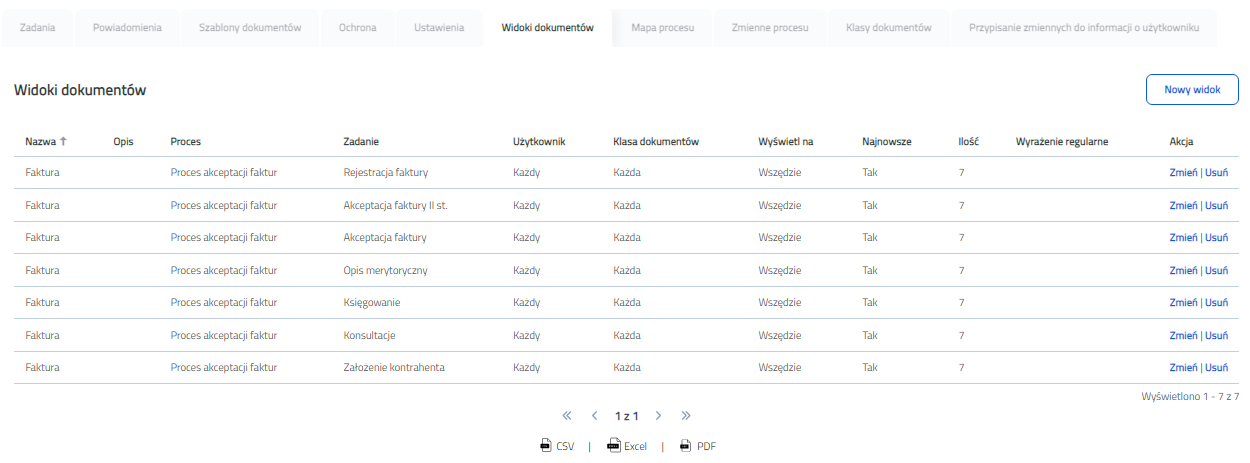
Figure 5.3.11 Process edition - Document views tab
The figure shows a table containing all defined views for the edited process. The table contains columns reflecting the form for adding a new document view.
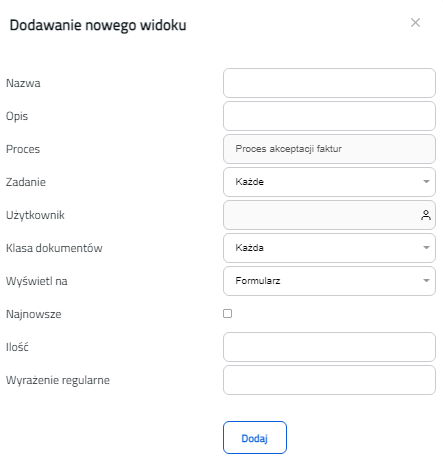
Figure 5.3.12 The window for adding a new view
The form consists of the following fields:
- Name - the name of the document view.
- Description - description of the document view.
- Process - the name of the process to which the document view applies. The field is already completed by the edited process and is not editable.
- Task - the task to which the document view will apply. The "Any" option applies to all process tasks.
- User - the user for whom we create the view. User selection is carried out by means of the "Users" buttons. After pressing it will show us a window with the selection of users (see Figure 2.3 and its description in Group management).
- Document class - specifies which document class should be used for documents. The "Each" option applies to all document classes.
- Latest - Whether the documents should be displayed from the most recent.
- Quantity - the number of documents to be displayed in the document view.
- Regular expression - Using the regular expression, you can filter the displayed documents based on the file name. Only files whose name meets the regular expression will be displayed, e.g. ^. * \. (Jpg | JPG | gif | GIF | pdf | PDF) $ (only displays files with the extensions pdf, gif and jpg)
After completing the form, add the document view using the "Add" button.
3.1.7. Process map
The tab is only available if the PlusWorkflowEditor module is installed. It provides a preview of the map of the edited process in graphical form.
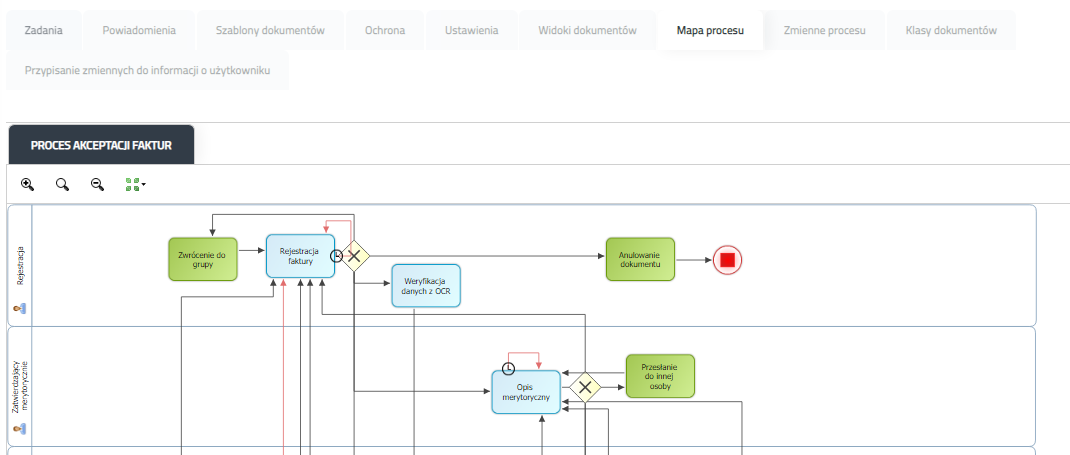
Figure 5.3.13 Process edition - Process map tab
3.1.8. Process variables
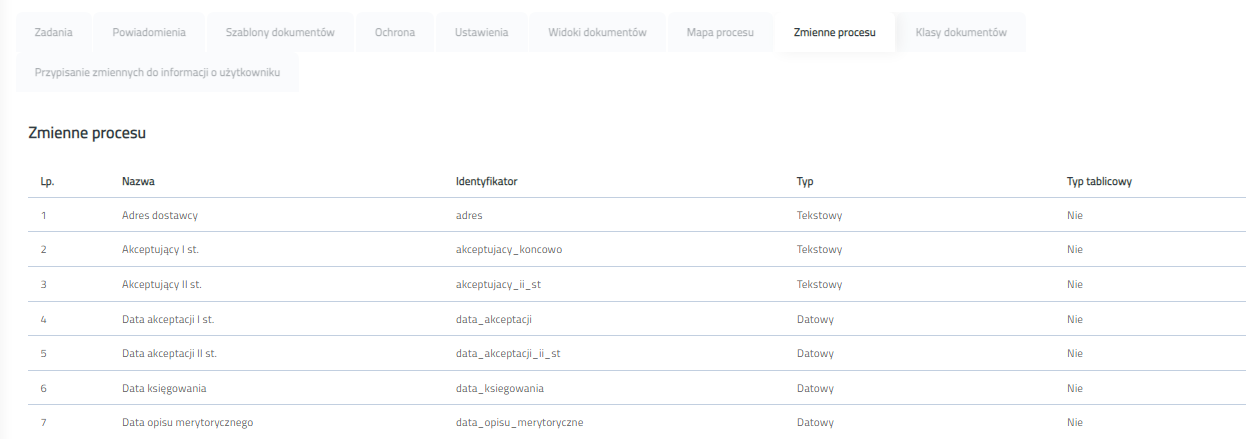
Figure 5.3.14 Process edition - Process variables tab
3.1.9. Document classes (in progress)
In the "Document classes" tab we can determine which document classes are to be available in a given process.

Figure 5.3.15 Process edition - Document classes tab
Options to choose:
- All - all document classes defined in the system will be available in the process.
- None - none of the document classes defined in the system will be available in the process.
- Selected - we have the option of choosing which document classes are to be available in the process.

Figure 5.3.16 Process edition - Document classes tab - "Selected" option selected
After clicking the "Add document class" button, the form for adding the document class to the process will open. Choose one of the document classes defined in the database and confirm with the "Add document class" button.

Figure 5.3.17 Window for adding a new document class to the process
Assigned document classes can be disconnected from the process using the "Delete" button located next to each assigned document class.
3.1.10. Assigning variables to user information
In the "Assigning variables to user information" tab we can determine which process variables are to be replaced in case of replacement of users in a given process.

Figure 5.3.18 Process edition - Assigning variables to user information tab
Options to choose:
- All - in case of replacement of users, all process variables matched to user login or user name will be replaced.
- None - in case of replacement of users, no variables will be replaced.
- Selected - we have the option of choosing which process variables will be replaced in case of replacement of users.

Figure 5.3.19 Process edition - Assigning variables to user information tab - "Selected" option selected
After clicking the "New assignment" button, the form for adding the variable assignment to the process will open. Choose one of the process variables and type of information that will be used in variable replacement. Available information types are Login and First and last name. Confirm adding using "Add assignment" button.

Figure 5.3.20 Window for adding a new variable assignment to the process
Assigned variables can be deleted from the process using the "Delete" button located next to each assigned variable. Changing selected type from "Selected" to another type triggers dialog window asking user for confirmation of change. Confirming dialog window causes deletion of all selected assigned variables.

Figure 5.3.21 Dialog window confirming change of assignment type from "Selected" to another type